반응형
이미지가 많아서 스크롤이 길지만, 진행해보면 생각보다 간단하니 잘 따라해보자!
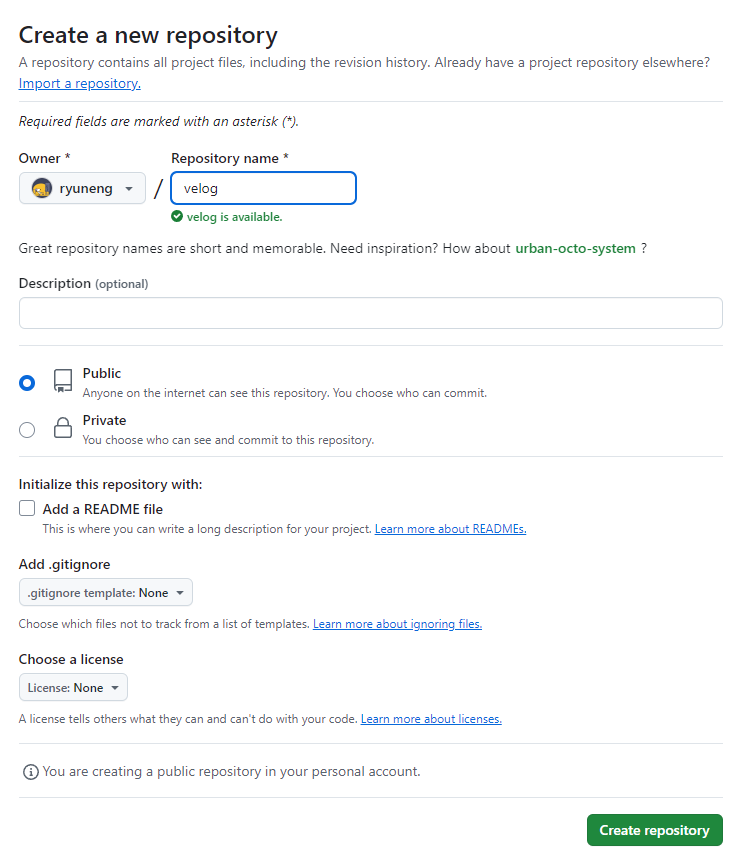
1. GitHub > Repository 생성
- Public으로 생성

2. update_blog.yml 파일 생성
> GitHub action 작성
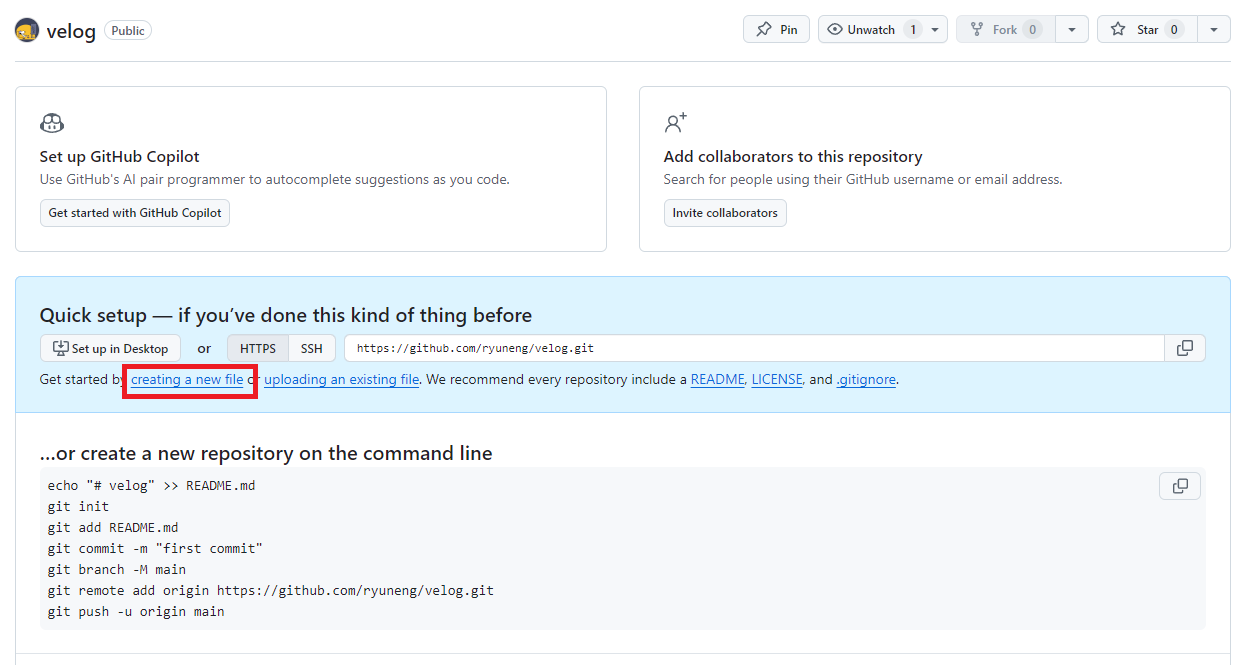
- 0) creating a new file 클릭
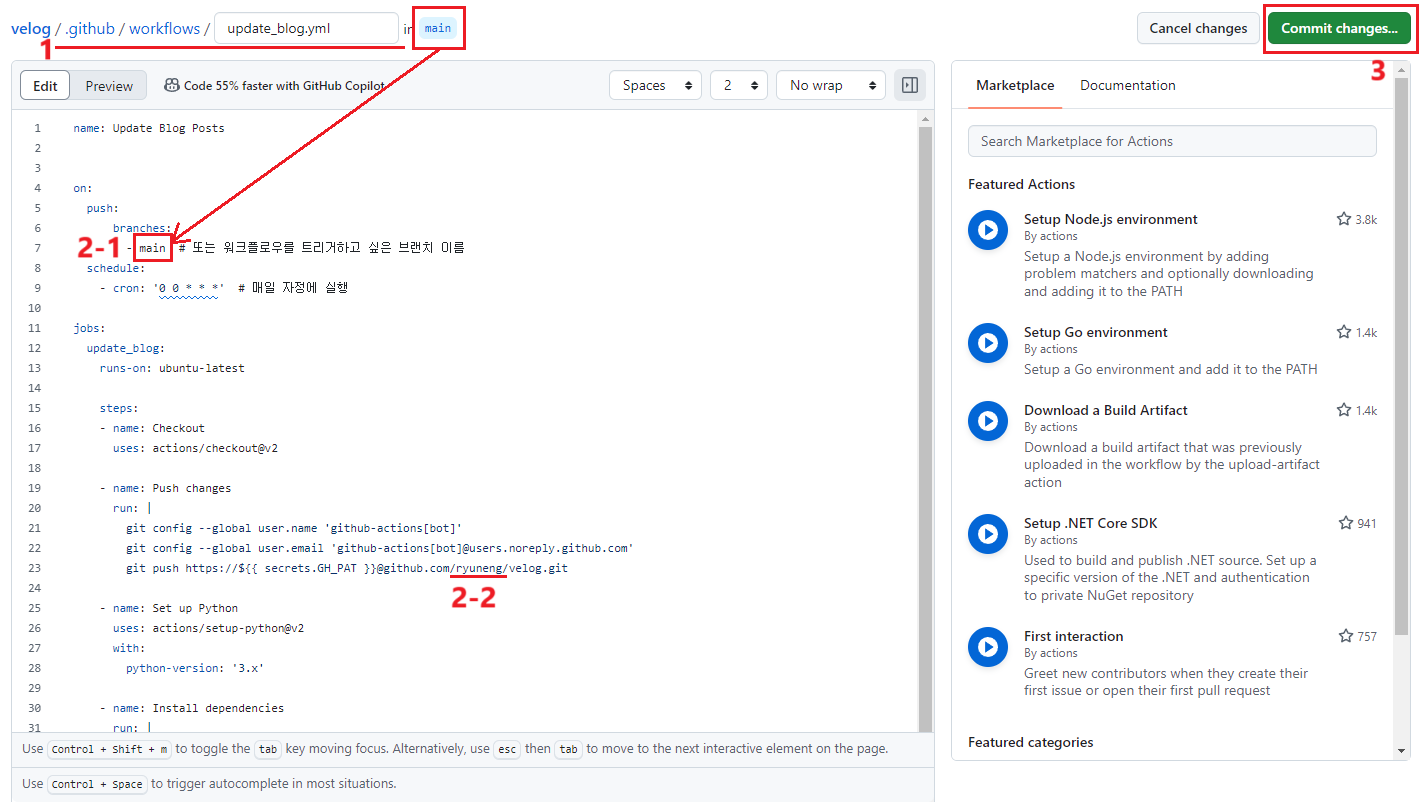
- 1) 파일 경로 : .github/workflows/update_blog.yml
> 이대로 작성하면 폴더도 자동으로 함께 생성됨
- 2) 내용
name: Update Blog Posts


on:
  push:
      branches:
        - [1.브랜치명]  # 또는 워크플로우를 트리거하고 싶은 브랜치 이름
  schedule:
    # 테스트를 원한다면, `한국 표준시 = UTC + 9` 참고해서 시간 수정한 후 테스트해보기
    - cron: '0 0 * * *'  # 매일 자정에 실행, UTC 협정 세계시 기준 (한국 시간 기준 오전 9시)
    - cron: '0 15 * * *' # 매일 자정에 실행, 한국 시간 기준 (UTC 15:00)

jobs:
  update_blog:
    runs-on: ubuntu-latest

    steps:
    - name: Checkout
      uses: actions/checkout@v2

    - name: Push changes
      run: |
        git config --global user.name 'github-actions[bot]'
        git config --global user.email 'github-actions[bot]@users.noreply.github.com'
        git push https://${{ secrets.GH_PAT }}@github.com/[2.본인깃허브아이디]/velog.git

    - name: Set up Python
      uses: actions/setup-python@v2
      with:
        python-version: '3.x'

    - name: Install dependencies
      run: |
        pip install feedparser gitpython

    - name: Run script
run: python scripts/update_blog.py- 3) Commit changes 클릭해서 커밋
- 참고 이미지
3. update_blog.py 파일 생성
> 파이썬 스크립트 작성
- 0) velog 리포지토리 > Add file > Create new file 클릭

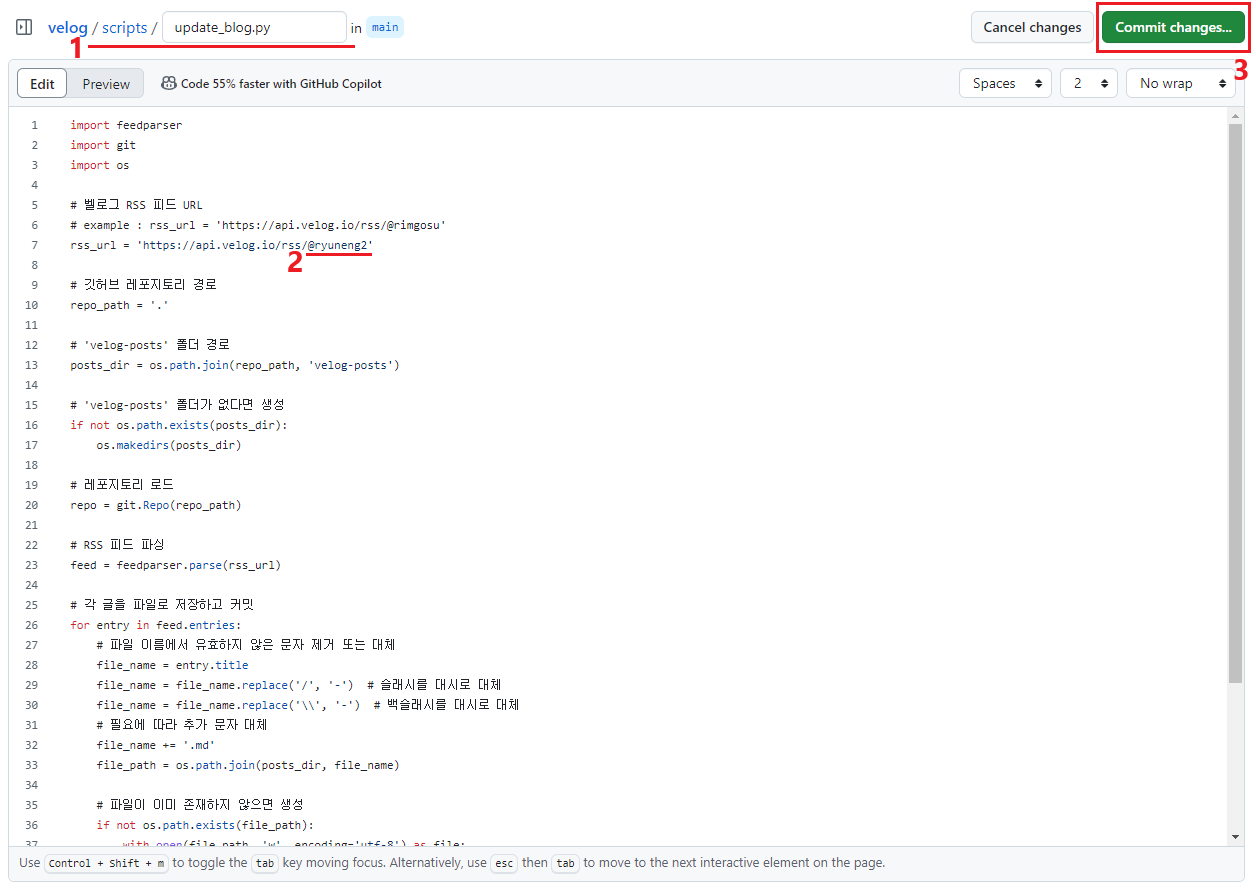
- 1) 파일 경로 : scripts/update_blog.py
> 이대로 작성하면 폴더도 자동으로 함께 생성됨
- 2) 내용
import feedparser
import git
import os

# 벨로그 RSS 피드 URL
# example : rss_url = 'https://api.velog.io/rss/@rimgosu'
rss_url = 'https://api.velog.io/rss/@[본인벨로그아이디]'

# 깃허브 레포지토리 경로
repo_path = '.'

# 'velog-posts' 폴더 경로
posts_dir = os.path.join(repo_path, 'velog-posts')

# 'velog-posts' 폴더가 없다면 생성
if not os.path.exists(posts_dir):
    os.makedirs(posts_dir)

# 레포지토리 로드
repo = git.Repo(repo_path)

# RSS 피드 파싱
feed = feedparser.parse(rss_url)

# 각 글을 파일로 저장하고 커밋
for entry in feed.entries:
    # 파일 이름에서 유효하지 않은 문자 제거 또는 대체
    file_name = entry.title
    file_name = file_name.replace('/', '-')  # 슬래시를 대시로 대체
    file_name = file_name.replace('\\', '-')  # 백슬래시를 대시로 대체
    # 필요에 따라 추가 문자 대체
    file_name += '.md'
    file_path = os.path.join(posts_dir, file_name)

    # 파일이 이미 존재하지 않으면 생성
    if not os.path.exists(file_path):
        with open(file_path, 'w', encoding='utf-8') as file:
            file.write(entry.description)  # 글 내용을 파일에 작성

        # 깃허브 커밋
        repo.git.add(file_path)
        repo.git.commit('-m', f'Add post: {entry.title}')

# 변경 사항을 깃허브에 푸시
repo.git.push()- 3) Commit changes 클릭해서 커밋
- 참고 이미지
4. PAT 권한 받기
1) GitHub 계정 > Settings 클릭

2) Developer settings 클릭

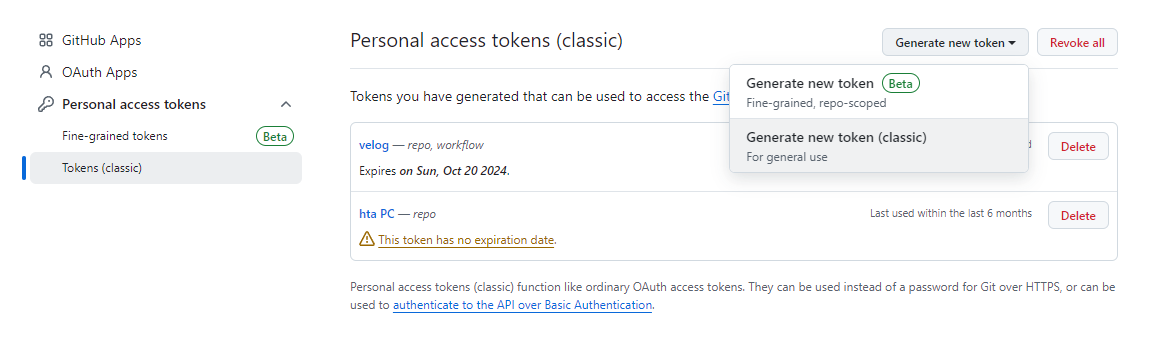
3) Personal access tokens > Tokens (classic) > Generate new token > Generate new token (classic) 클릭
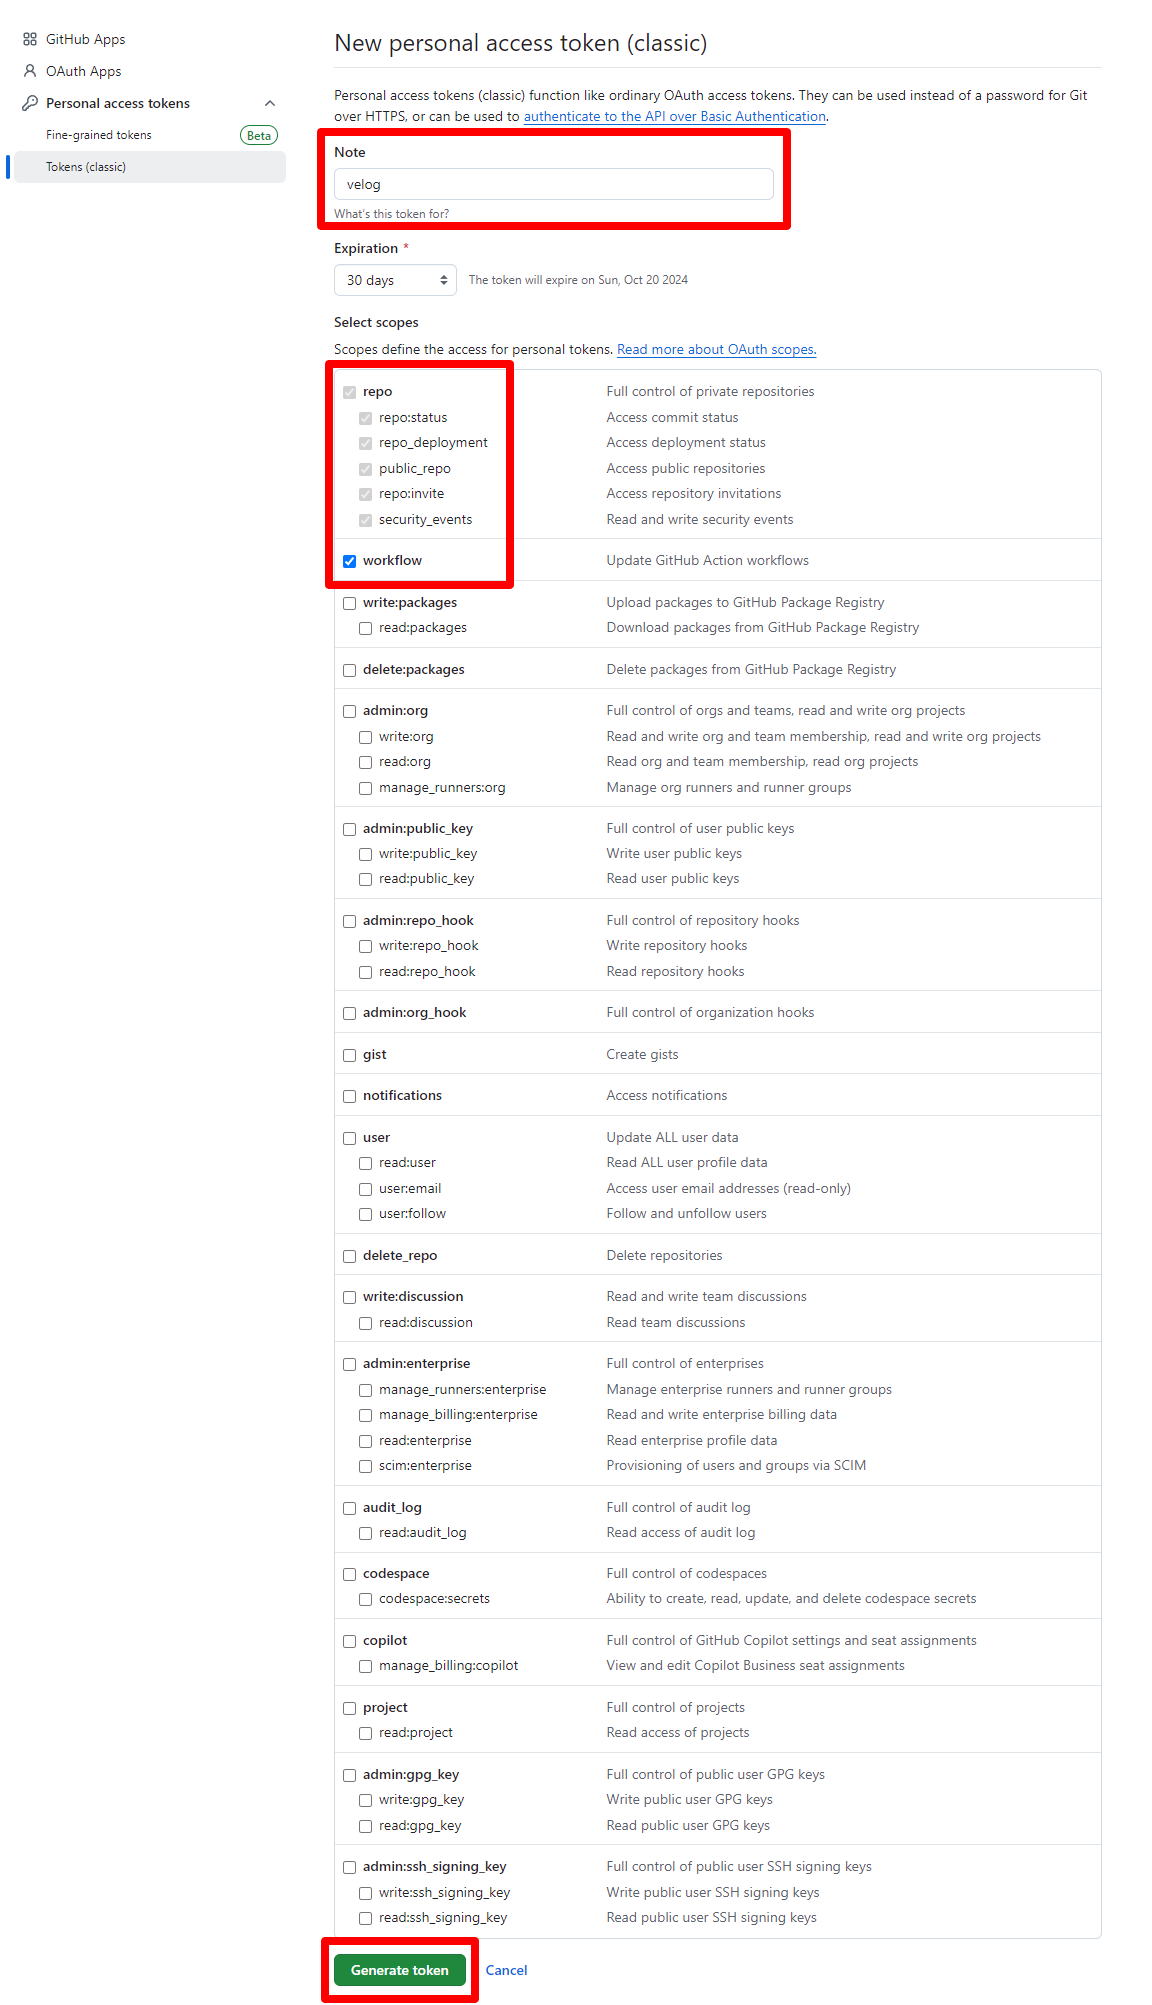
4) 토큰 이름 작성 & repo, workflow 체크 후 Generate token 클릭
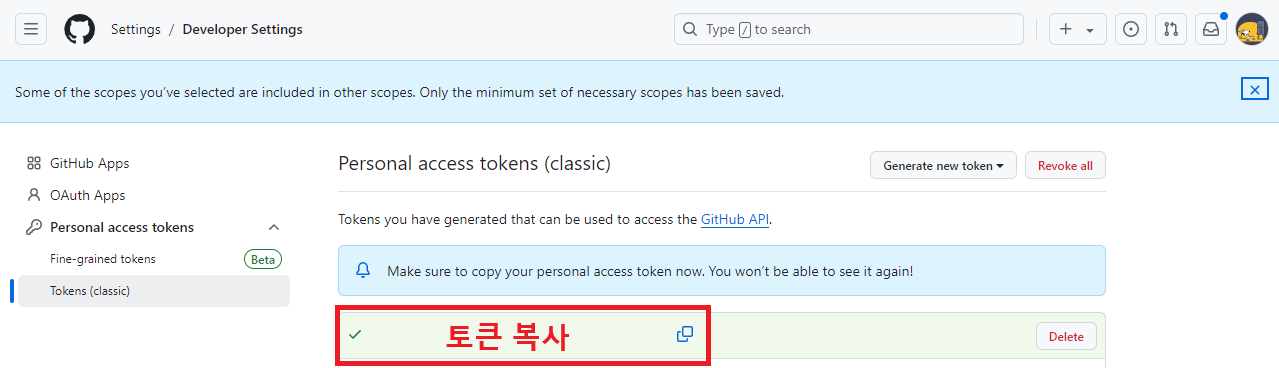
5) 토큰 복사
- 이 창을 벗어나면 이후에는 토큰 확인이 불가하니 꼭 복사 !! 해두기
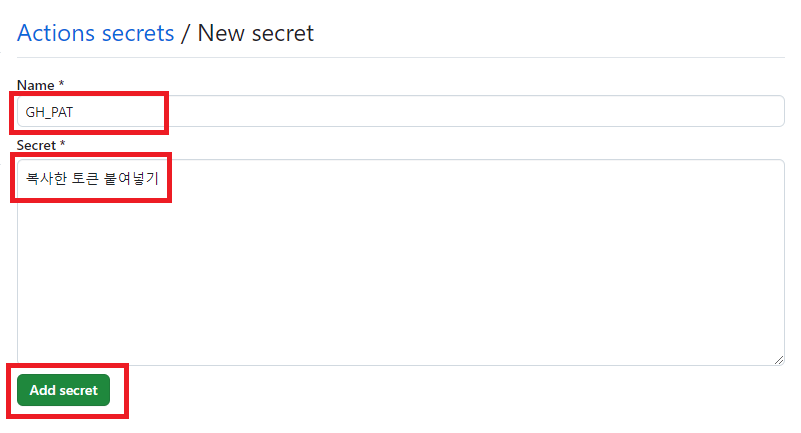
6) velog 리포지토리 > Settings > Secrets and Variables > Actions > New repository secret 클릭
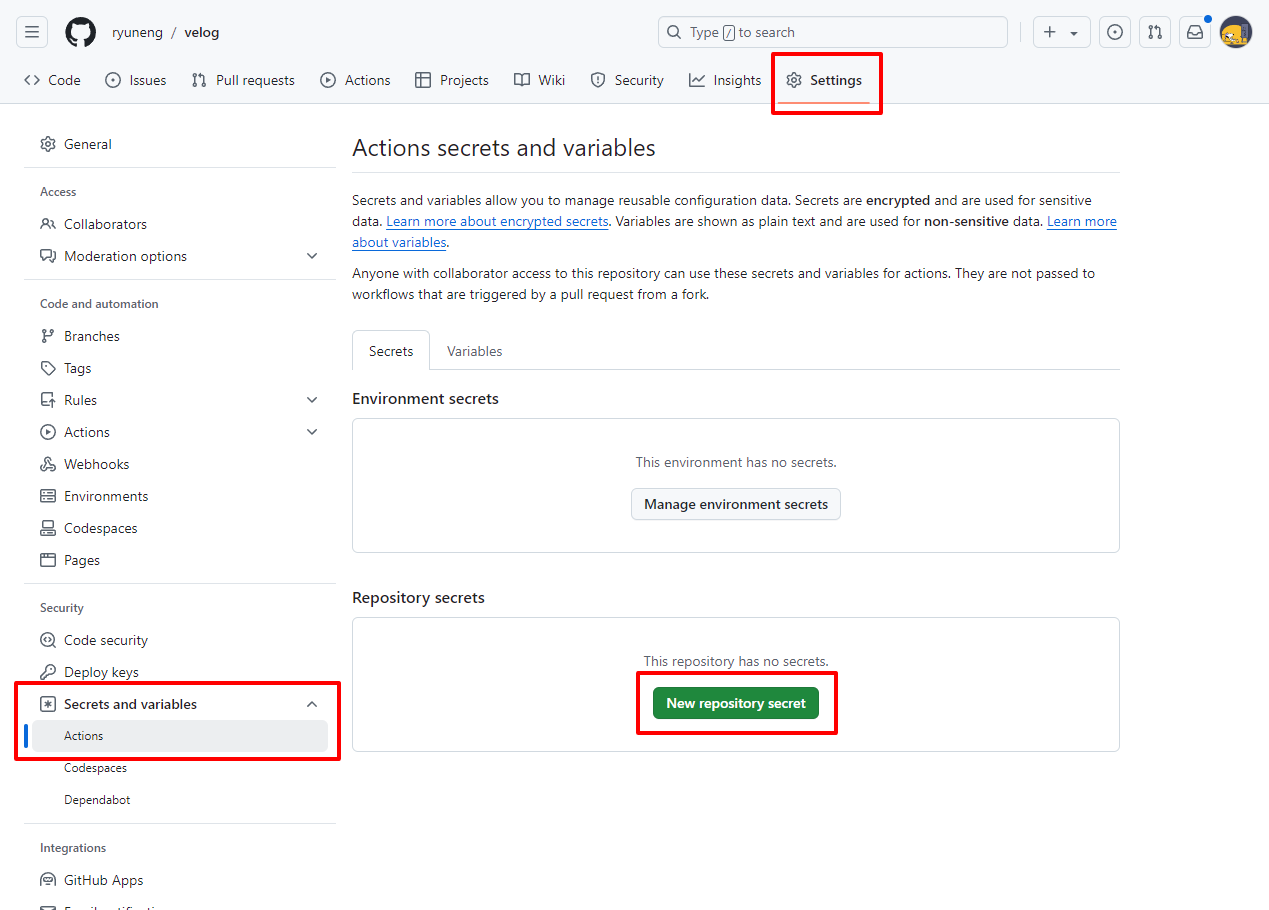
7) Name, Secret 작성 후 Add secret 클릭
- Name : GH_PAT
- Secret : 위에서 복사한 토큰 붙여넣기
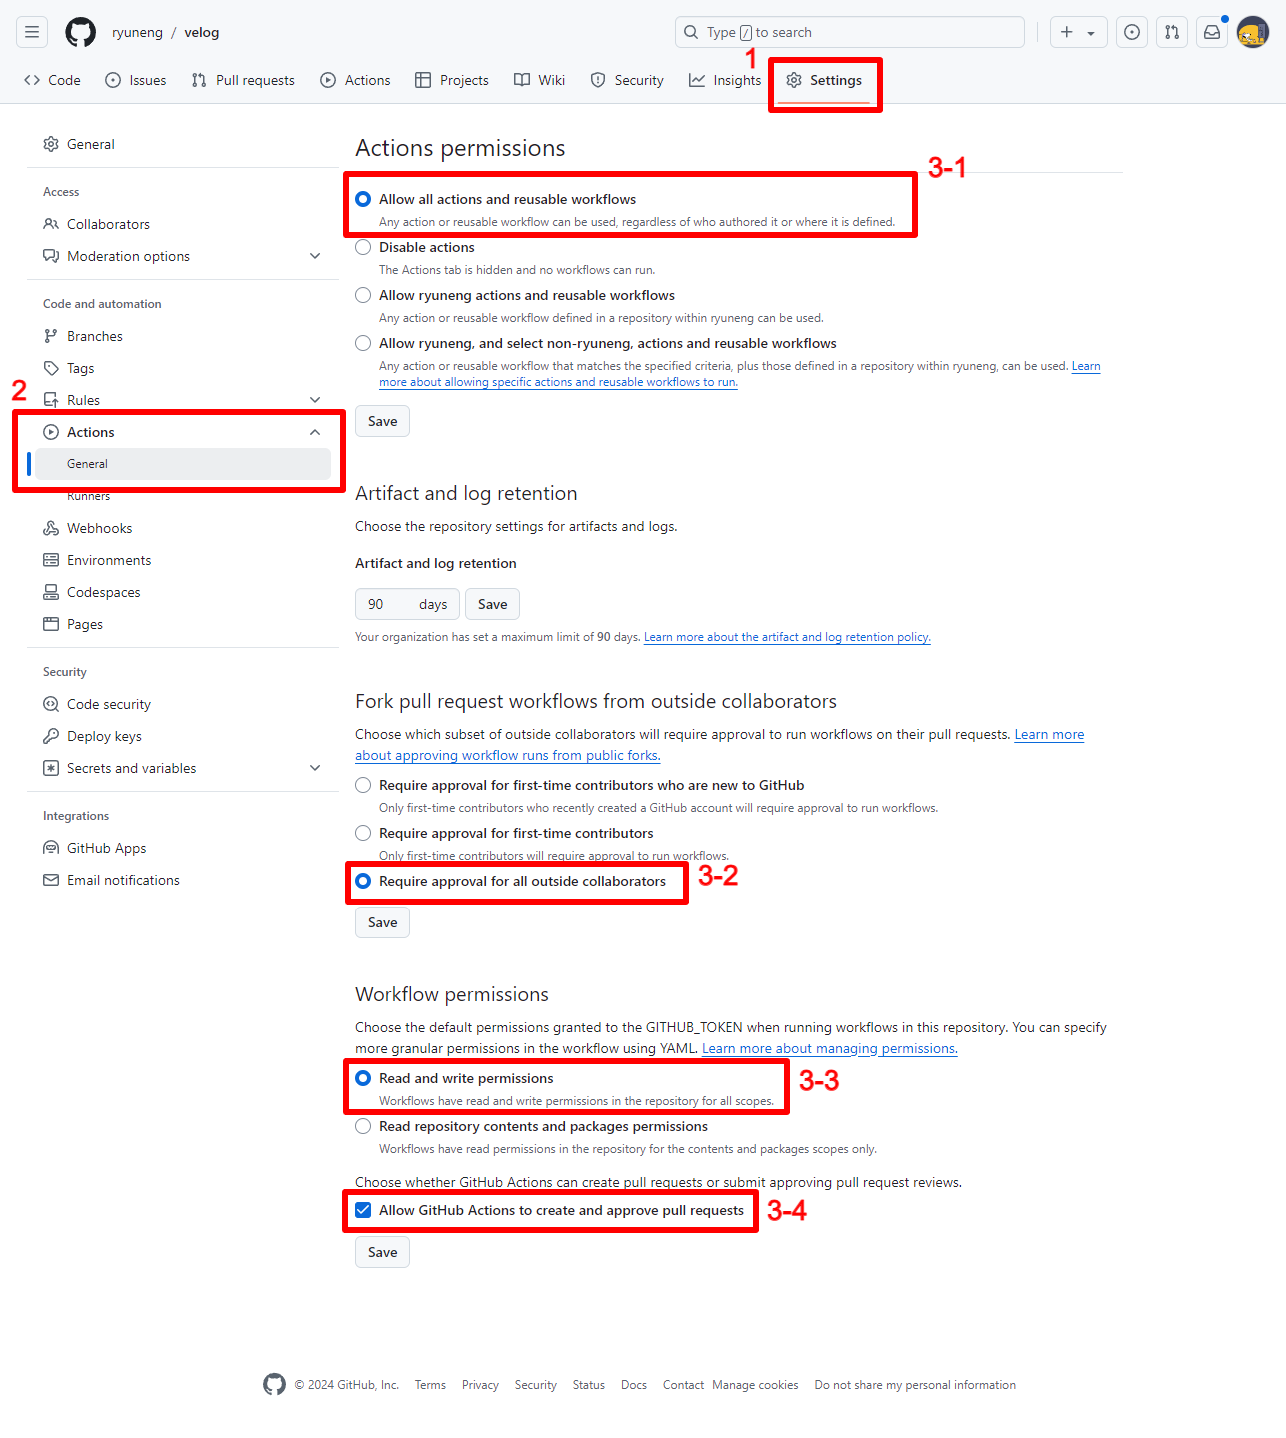
5. 리포지토리에 외부 권한 부여
- 1) velog 리포지토리 > Settings 클릭
- 2) Actions > General 클릭
- 3) 4개 체크 및 Save (각 항목 변경할 때마다 Save도 잊지 말고 눌러주기)
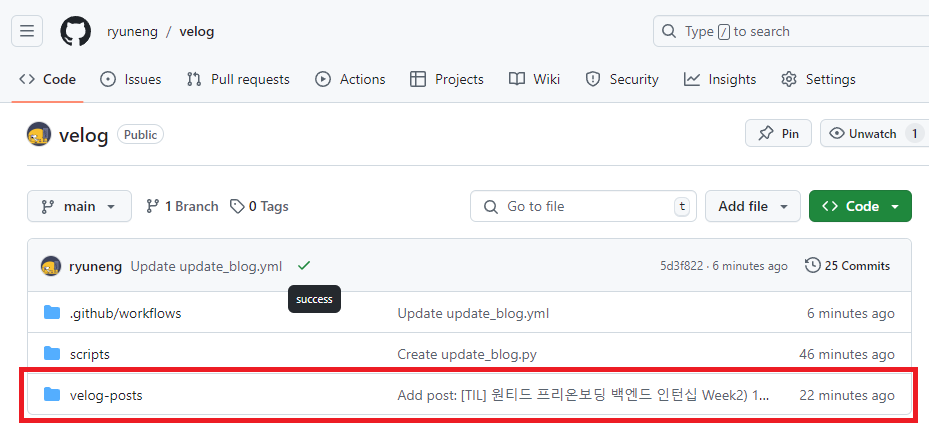
💡 성공 확인!
velog-posts 폴더와 함께 벨로그에 작성한 글이 커밋된 것을 확인할 수 있다.
References
< 해당 글은 velog에서 이전하며 옮겨온 글로, 가독성이 좋지 않을 수 있는 점 양해 부탁드립니다. >
🔗 velog 버전 보기 : https://velog.io/@ryuneng2/GitHub-velog와-GitHub-연동하기-velog-글-작성-시-자동으로-깃허브에-커밋하는-방법
'etc' 카테고리의 다른 글
| 부하 테스트의 기본 개념, Windows K6 설치 방법 (0) | 2025.01.25 |
|---|---|
| [MySQL] 대량의 더미 데이터를 생성하는 로직 (0) | 2025.01.25 |
| [GitHub] 로컬에서 깃허브 원격 저장소 변경하는 방법 (0) | 2025.01.24 |
| [gRPC] gRPC란? (0) | 2025.01.24 |
| [AWS] 인텔리제이 Database 플러그인을 활용한 AWS RDS DB 연결 방법 (0) | 2025.01.21 |